Range Rover Evoque: Loadspace Trim Panel
Land Rover Range Rover Evoque L538 (2011–2018) Service Manual / Body and Paint / Interior Trim and Ornamentation / Loadspace Trim Panel
CAUTION: LH illustration shown, RH is similar.
NOTE: Removal steps in this procedure may contain installation details.
All vehicles
1.

2.
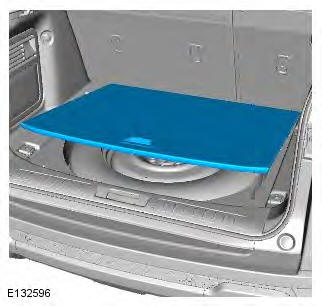
3.

4. Torque: 1.4 Nm

5. Torque: 20 Nm

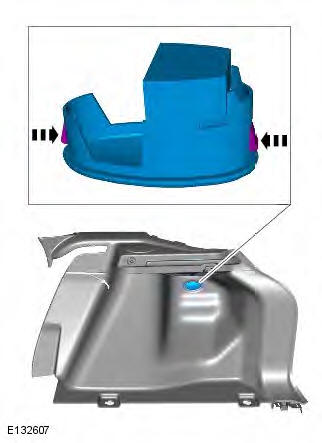
6. NOTE: LH side only.

7.

5-door
8.

9. CAUTION: Take extra care not to damage the clips.
Release the lower retaining clips first and then the upper retaining clips. Slide the trim panel forwards to detach the trim panel.

3-door
10. CAUTION: Take extra care not to damage the clips.

All vehicles
11. NOTE: If equipped.

12. NOTE: Do not disassemble further if the component is removed for access only.

13. NOTE: LH side only.

14. NOTE: RH side only.
Installation
1. CAUTION: Take extra care not to damage the clips.
To install, reverse the removal procedure.
READ NEXT:
 C-Pillar Upper Trim Panel
Removal
NOTE: Removal steps in this procedure may contain installation details.
1.
2.
3.
4.
5. Torque: 6 Nm
6.
Installation
1. To install, reverse the removal procedure.
C-Pillar Lower Trim Pane
Rear Quarter Trim Panel
Removal
NOTE: Removal steps in this procedure may contain installation details.
1. Refer to: Rear Seat Cushion (501-10 Seating, Removal and
Installation).
2. Refer to: Loadspace Trim Panel (501-05 Int
Exterior Trim and Ornamentation
Torque Specifications
Rear Quarter Panel Moulding
Removal
NOTE: Removal steps in this procedure may contain installation details.
1.
2. NOTE: Discard the retaining clips.
Make sure that the centre
SEE MORE:
Voice tutorial
To listen to a tutorial detailing the operation of
the Voice system:
- Briefly press the Voice button to start a
voice session.
- Wait for the tone to sound, then say Voice
tutorial.
Alternatively, the tutorial can be selected using
the touch screen, as follows.
- Select Setup from the touch
Spring Vehicles Without: Dynamic Suspension
Removal
WARNINGS:
Make sure the spring compressor Safe Working Load (SWL) meets or exceeds
the spring rating quoted in the
Specifcations section.
Always follow the spring compressor manufacturer's instructions.
The spring is under extreme tension, care must be taken at all times. Failure to
foll
© 2011-2025 Copyright www.rrevoque.org

