Range Rover Evoque: Manual Transmission/Transaxle and Clutch - General Information
Lubricant

Capacities

General Specification

Torque Specifications

Clutch System Bleeding
NOTE: Some variation in the illustrations may occur, but the essential information is always correct.
All vehicles
1. Check that all the clutch line connections are tight and that there are no signs of leaks.
Left-hand drive vehicles
2.

Right-hand drive vehicles
3.
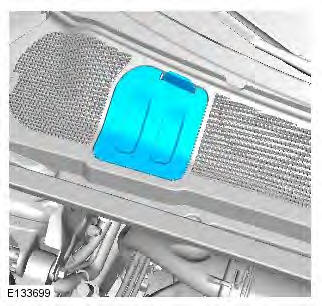
All vehicles
4. NOTE: RHD illustration shown, LHD is similar.
- Remove the brake fluid reservoir cap.
- Fill the brake fluid reservoir to the MAX mark.

5. Refer to: Air Cleaner (303-12, Removal and Installation).
6. Attach the clear bleed tube to the clutch bleed screw and immerse the free end of the bleed tube in a bleed jar containing a small quantity of approved brake fluid.

7. Loosen the bleed screw by two complete turns.
8. CAUTION: The brake fluid reservoir must remain full with new, clean brake fluid at all times during bleeding.
Depress the clutch pedal steadily through its full stroke. With the pedal held down, close the bleed screw. When the bleed screw is fully closed, allow the clutch pedal to return to the rest position.
Repeat the procedure until a flow of clean, air-free fluid is being pumped into the bleed jar.
9. CAUTION: Make sure the bleed screw cap is installed after bleeding. This will prevent corrosion to the bleed screw.
With the clutch pedal fully depressed, tighten the bleed screw.
Torque: 10 Nm
Left-hand drive vehicles
10.
- Fill the brake fluid reservoir to the MAX mark.
- Install the brake fluid reservoir cap.

11. Install the fluid reservoir access panel.

Right-hand drive vehicles
12.
- Fill the brake fluid reservoir to the MAX mark.
- Install the brake fluid reservoir cap.

13. Install the fluid reservoir access panel.

All vehicles
14. Operate the clutch pedal and check for leaks.
15. Refer to: Air Cleaner (303-12, Removal and Installation).
Gearshift Cable Adjustment
NOTE: Removal steps in this procedure may contain installation details.
1.

2.

3. Refer to: Floor Console (501-12 Instrument Panel and Console, Removal and Installation).
4.
- Release the LH cable securing clip.
- Allow the gearshift lever to come to rest in the neutral position.
- Secure the cable selector clip, without disturbing the gearshift selector lever position.

5. To install, reverse the removal procedure.
READ NEXT:
 Clutch
Lubricants, Fluids, Sealers and Adhesives
General Specification
Torque Specifications
* Tighten bolts progressively by diagonal selection.
Clutch Disc and Pressure Plate Vehicles With: M66 6-Speed
Clutch Controls - Vehicles With: M66 6-Speed Manual Transmission AWD
Torque Specifications
Clutch
Controls - Component Location
COMPONENT LOCATION
Brake/clutch reservoir
Clutch pedal bracket
Clutch master cylinder
High pressure hose
Connector
Clutch slave cyli
SEE MORE:
Air Distribution and Filtering
Component Location
NOTE: Right Hand Drive (RHD) shown, Left Hand Drive (LHD) similar
COMPONENT LOCATION
Passenger face level/side window register
Side window vent
Face level duct
Side window duct
Windshield duct
Windshield vent
Side window vent
Driver face level/side window register
Drive
Wiring Harness - Description and Operation
Introduction
CAUTION: Do not use any other heat shrink sleeve other than the approved
glue lined heat shrink sleeve mentioned
in the repair procedure.
The purpose of this document is to promote quick and efficient minor repair
to harness connectors or cables using
approved methods and the wiring
