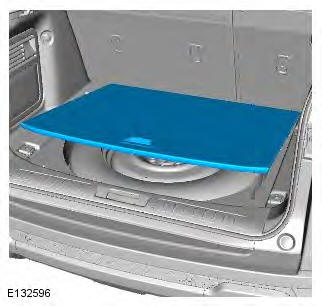
Range Rover Evoque: Loadspace Trim Panel
Land Rover Range Rover Evoque L538 (2011–2018) Service Manual / Body and Paint / Interior Trim and Ornamentation / Loadspace Trim Panel
CAUTION: LH illustration shown, RH is similar.
NOTE: Removal steps in this procedure may contain installation details.
All vehicles
1.

2.
3.

4. Torque: 1.4 Nm

5. Torque: 20 Nm

6. NOTE: LH side only.

7.

5-door
8.

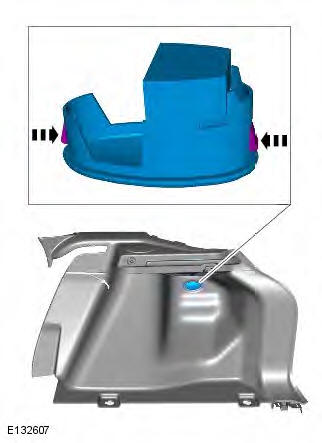
9. CAUTION: Take extra care not to damage the clips.
Release the lower retaining clips first and then the upper retaining clips. Slide the trim panel forwards to detach the trim panel.

3-door
10. CAUTION: Take extra care not to damage the clips.

All vehicles
11. NOTE: If equipped.

12. NOTE: Do not disassemble further if the component is removed for access only.

13. NOTE: LH side only.

14. NOTE: RH side only.
Installation
1. CAUTION: Take extra care not to damage the clips.
To install, reverse the removal procedure.
READ NEXT:
 C-Pillar Upper Trim Panel
Removal
NOTE: Removal steps in this procedure may contain installation details.
1.
2.
3.
4.
5. Torque: 6 Nm
6.
Installation
1. To install, reverse the removal procedure.
C-Pillar Lower Trim Pane
Rear Quarter Trim Panel
Removal
NOTE: Removal steps in this procedure may contain installation details.
1. Refer to: Rear Seat Cushion (501-10 Seating, Removal and
Installation).
2. Refer to: Loadspace Trim Panel (501-05 Int
Exterior Trim and Ornamentation
Torque Specifications
Rear Quarter Panel Moulding
Removal
NOTE: Removal steps in this procedure may contain installation details.
1.
2. NOTE: Discard the retaining clips.
Make sure that the centre
SEE MORE:
Heating and Ventilation
Component Location
COMPONENT LOCATION
ATC (automatic temperature control)
RH (right-hand) ventilation outlet
LH (left-hand) ventilation outlet
Heater assembly
Blower motor control module
Overview
OVERVIEW
Two levels of heating and ventilation are available. Standard specification
vehicles a
Transfer Case
Connecting Sleeve Seals TD4 2.2L Diesel, Vehicles With: M66 6-Speed
Manual Transmission AWD
Special Tool(s)
100-012
Slide Hammer
303-1300
Remover, Crankshaft Seal
303-538
Remover/Installer, Crankshaft Oil Seal
307-594
Installer, Seal
307-595
Installer, Intermediate Shaft Seal
308-615
Remover, Seals
Removal
NOTE: Some variation in the illustrations may occur, but the essential
information
© 2011-2024 Copyright www.rrevoque.org
